Step 13: Open Your Browser And Setup The WordPress Installation
Finally, we have done all the necessary steps in order for us to actually setup WordPress.
Open your browser, and type your VPS’s IP address into the location bar. For example, go to
http://123.456.789.0
WordPress Installation Page 1
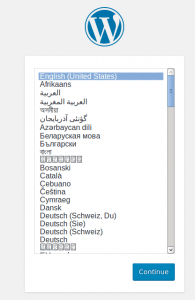
The first page you should see is one with the WordPress logo, and a choice of languages. Choose the language you want, then click on the “continue” button.
WordPress Installation Page 2
Next, you should see a page, that says “Before getting started. Welcome to WordPress. Before getting started, we need some information on the database. You will need to know the following items before proceeding.
Database name
1. Database username
2. Database password
3. Database host
4. Table prefix (if you want to run more than one WordPress in a single database)
Click on the “Let’s go” button.
WordPress Installation Page 3
You will then be sent to a page that looks like the following:
On this page, you will enter your database name, database username and password for that username. Remember that we created all of the database information in step 2 of this article.
Below is a screenshot of inputting the database name exampledotcomdatabase, username exampleusername, and password abcdefg12345. Leave all other boxes as they are by default.
After you have inserted the database info, click on the “Submit” button.
WordPress Installation Page 4
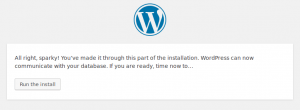
Next, if done properly, you should see a page that says, “All right, sparky! You’ve made it through this part of the installation. WordPress can now communicate with your database. If you are ready, time now to…”
Click on the button that says “Run the install”.
This article is continued on the next page.


I quite like reading through an article that can make people think.
Also, many thanks for allowing for me to comment!
Thanks for the nice comment! I hope you enjoy more articles on this site too!